What is Viva Connections?
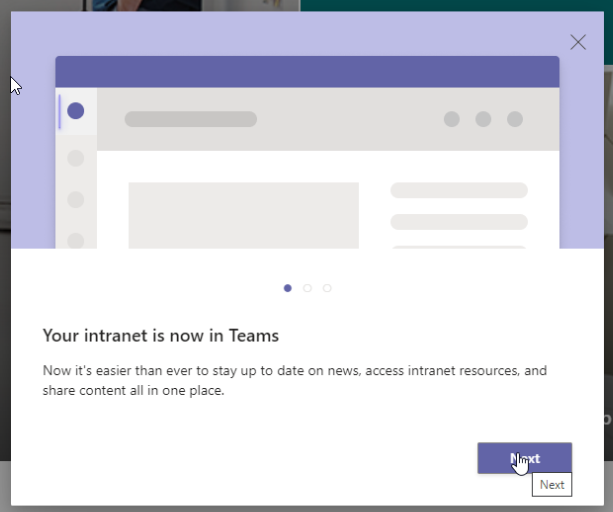
Viva Connections is a new feature through which you can deliver your intranet directly to Teams. It takes company news, documents, lists and other content from your SharePoint Intranet, and makes available inside Microsoft Teams. The Viva Connections area in Microsoft Teams can be branded with logo and name, so it will mimic your existing SharePoint intranet home page.
Most of the content that people see in Viva Connections will already be available in SharePoint. And you will still need a SharePoint intranet to be able to use Viva Connections successfully.
For this Guide i just use a Default Communications site in my own tenant.
Why use Viva Connections?
Today employees spend more and more time in Teams – and thus less and less time in Sharepoint, for many Teams as the Hub for collaboration, has become the “sharepoint client” for many – so they maybe only rarely see the Company Intranet page – by using Viva connections we can bring it to front and center.
Also another important factor here is that by bringing the intranet site into a Teams app, we make it much easier to access via mobile.

Get started
First you must make sure that your company intranet page is a moderne Sharepoint Online site, calssic Sharepoint sites are not supported by Viva Connections.
Not its time to start the Journey.
Prerequisites:
Sharepoint admin (Global admin obviously also works)
Powershell – with ability to install a new module
Teams Admin – with ability to add new apps to Teams admin centre.
Viva connections script. Can be found here: https://download.microsoft.com/download/4/7/f/47fbd38a-05ae-4337-a782-74a8f5f7bff5/viva-connections-desktop.zip
Procedure:
- Make sure the Sharepoint site is ready
- Enable Global Navigation
- Run the Script – to create custom app
- Upload the App to Teams
- Distribute app to end users.
First we connect to Sharepoint online in Powershell:
Open Powershell and run the following.
install-module -name microsoft.online.sharepoint.powershell -force
Now connect to your tenant – replace juhlconsult with your tenant-name.
Connect-SPOService -url https://juhlconsult-admin.sharepoint.com
Now you need to set Home site to the Company Intranet (if its not already so) – URL in my example goes to my default communications site – replace with your own URL
set-spohomesite -HomeSiteUrl https://juhlconsult.sharepoint.com/sites/JuhlCom

When setting the Home site, it asks for confirmation – give it a Y

No you need to set the Global Navigation.
Go back to your Home site in Sharepoint and find the Cogwheel up top right, and select “Global Navigation”
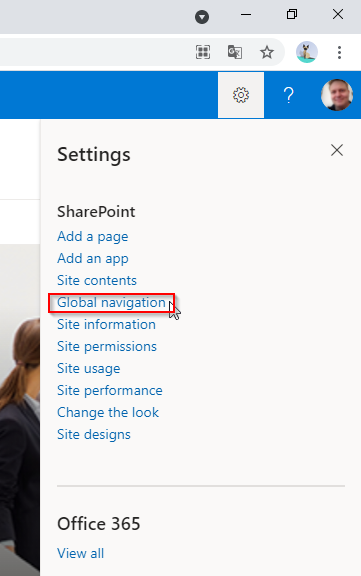
Enable and choose “Home Site Navigation”

What this does is changing the default sharepoint “HOME” button to use navigation from your home site – this will also be the case in the Teams App we add later for this.
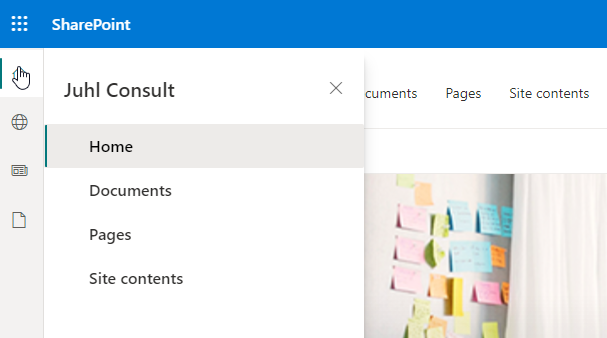
Like this:
If you have a Company logo handy, now is the time to add it to the Home Site – this is done in the same “Global Navigation” menu.
Click the Upload button and upload Logo file of 192×192 pix.
Teams app time
Now Sharepoint side of things is ready, its time to turn to Teams.
In order to run the Viva Connections script you downloaded, there are som prerequistes that it will ask for, so you might prepare this now:
- URL of the SharePoint site you want to show in Viva Connections
- Name of the icon that will appear on the Teams app bar (left rail) that will navigate your people to Viva Connections. Usually, that’s just your company name like Contoso.
- App short description (80 characters): short description of your app. This will appear in Teams app catalog.
- App long description (up to 4,000 characters): long description of your app. This will also appear in your Teams app catalog.
- Privacy policy: your own company privacy policy web page (must start with https://). If you don’t have one, press Enter and the script will automatically use SharePoint’s privacy policy from Microsoft.
- Terms of use: web page of terms of use for your company (must start with https://). If you don’t have one, press Enter and the script will automatically use SharePoint’s terms of use from Microsoft.
- Company name: your organization name that will be visible on the app page in Teams app catalog in “Created By” section.
- Company website: your company’s website (must start with https://) that will be linked to your company’s app name.
- Icons: you need to provide two png icons. A 192×192 pixel colored icon for Teams app catalog. And a 32×32 pixel monochrome icon for Teams app bar.
Now run the script and fill in the info.
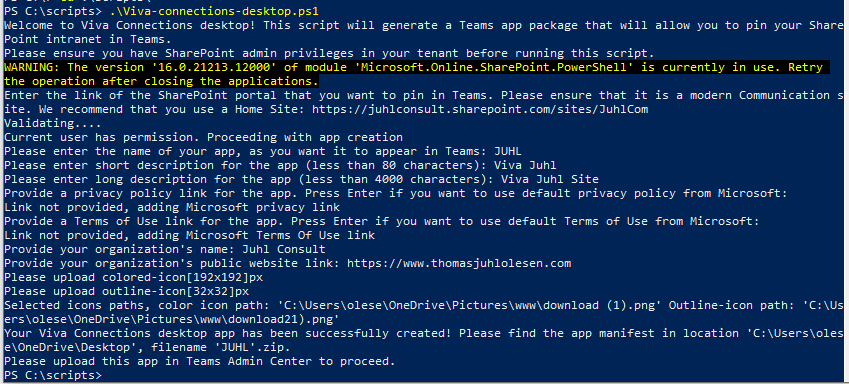
Tadaa – now on your desktop, you will find a ZIP file with the name of your site.
Go to the Teams admin centre.
Under TeamsApps – press “Manage Apps”
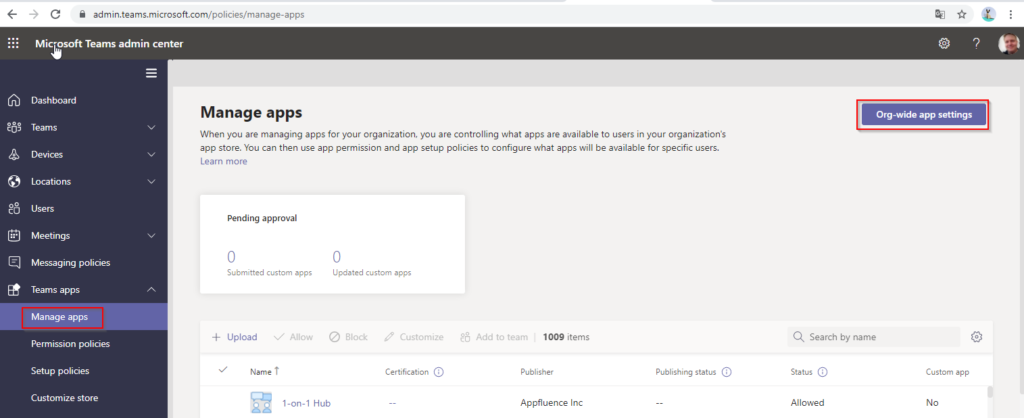
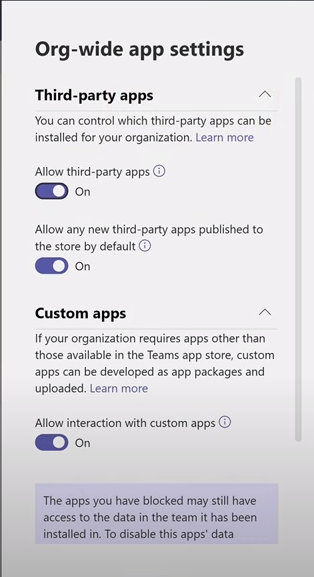
First you must make sure that 3.rd party apps are allowed in “Org-wide” app settings
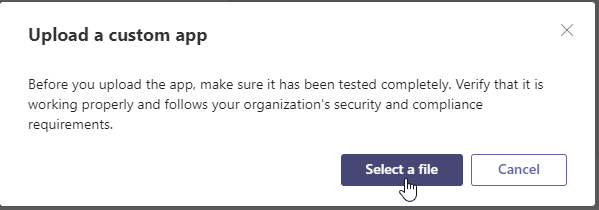
Now click +Upload and point to the Zip file on the Desktop.
Now you should be able to type in the name of your app and find it in the list.
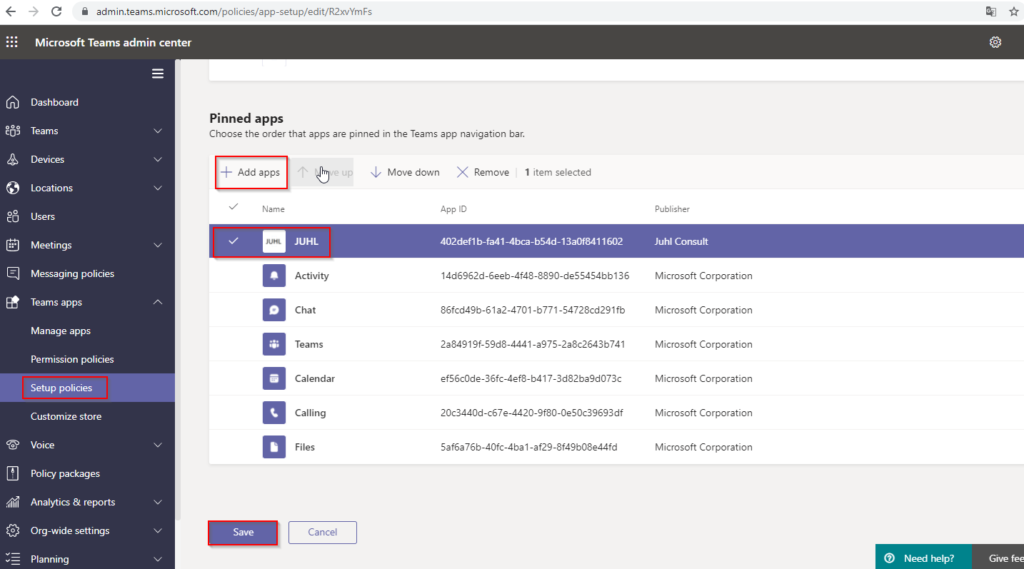
No go to “Setup Polices” in the menu 2 steps below “Manage Apps”
Here you need to add the App to Pinned Apps – AND move it to the TOP.
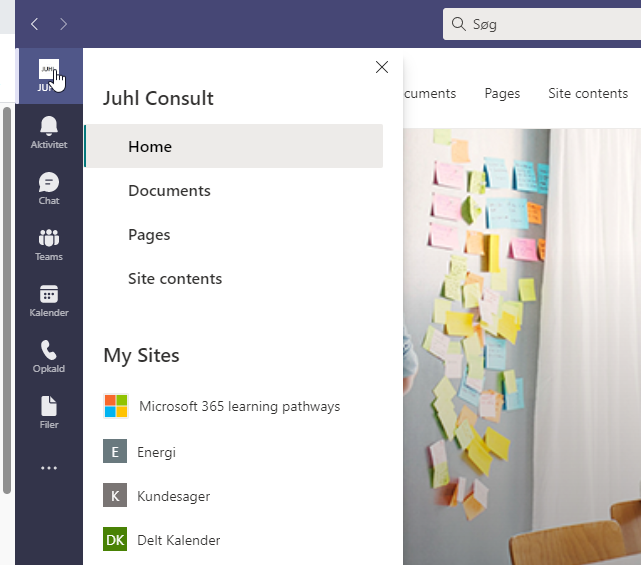
Now the next time you users open Teams they will see the new app with the Company intranet on top of their navigation bar in Teams, this is a supercool way of bringing the company intramet INTO Teams.

And because you changed the Global Navigation to “Home site” this also gives super easy navigation within Teams.
So Thats it, your all set – with Viva Connections – the existing company intranet is now where the users are = in Microsoft Teams.
Have a great day.